

Granite is a popular flooring material chosen for its high durability, aesthetic appeal, and its ability to give a home a modern feel. To achieve the best results, a proper installation technique is required so that the granite is not only beautiful to look at but also lasts for years to come.
One of the most popular methods today is installing granite without grout, as it creates a surface that is flatter, cleaner, and visually more expansive. With a systematic approach from preparation to finishing, you can achieve a flawless, strong, and highly aesthetic granite floor. To learn the detailed process, please continue reading this comprehensive guide.
What is Grout in Tiling?
Grout is the filler used for the joints or gaps between tiles, typically made of a special mixture like cementitious grout. It serves several functions: it keeps the floor structure strong, prevents cracks caused by movement, stops moisture from seeping underneath, and provides a tidy appearance. In some modern methods, however, a groutless installation is chosen for a more seamless final look.
How to Install Granite Tiles Without Grout for an Aesthetic Result
1. Meticulously Prepare Your Tools and Materials
Before starting a groutless installation, the first step is to prepare all your equipment. The necessary materials include cement, sand, and water (for a traditional mix) or a specialized tile adhesive. The tools you will need include a notched trowel to spread the adhesive, a rubber mallet to adjust the tile positions, a spirit level to ensure a flat surface, a tape measure for precise measurements, a grinder with a diamond blade for clean cuts, and thin tile spacers for temporary alignment if needed. The subfloor must be level, dry, clean, and free of any debris to ensure a strong bond.
2. Mix the Adhesive Mortar Correctly
The quality of the adhesive mix is critical for a strong bond and preventing hollow spots under the tiles. For a traditional sand-and-cement mortar, use a ratio of 1 part cement to 3 parts sifted sand. Add clean water gradually until you achieve a damp, semi-wet consistency—it should hold its shape when squeezed in your hand without crumbling.
Alternatively, a highly recommended option for quality and ease of use is a pre-mixed adhesive (thin-set mortar) specifically for granite tiles. Mix it according to the package directions until there are no lumps. The advantage of thin-set mortar is its superior bonding strength and flexibility, which reduces the risk of cracking.
3. Inspect and Select Your Granite Tiles
Choose granite tiles from the same batch or grade to avoid variations in thickness, which can complicate a groutless installation. Visually inspect each tile and check it with a spirit level to ensure none are warped. Perform a dry lay (arranging the tiles without adhesive) first according to your desired pattern. This helps minimize cuts and ensures that any veining patterns match up nicely.
4. Create a Precise Pattern and Layout
Use a chalk line or a laser level to create guidelines starting from the center of the room. Begin the installation from this central point and work your way outwards. This method is crucial for ensuring all tiles are installed straight and symmetrically. For a groutless installation, accurate measurements and cuts are everything.
5. Apply the Mortar Evenly and Consistently
Spread the adhesive—whether traditional mortar or thin-set—onto the subfloor using a notched trowel. Hold the trowel at a 45-degree angle to create consistent ridges. Also, apply a thin layer of adhesive to the back of each granite tile (a technique known as back buttering) to ensure a perfect bond and eliminate air pockets. The thickness of the mortar bed must be uniform everywhere.
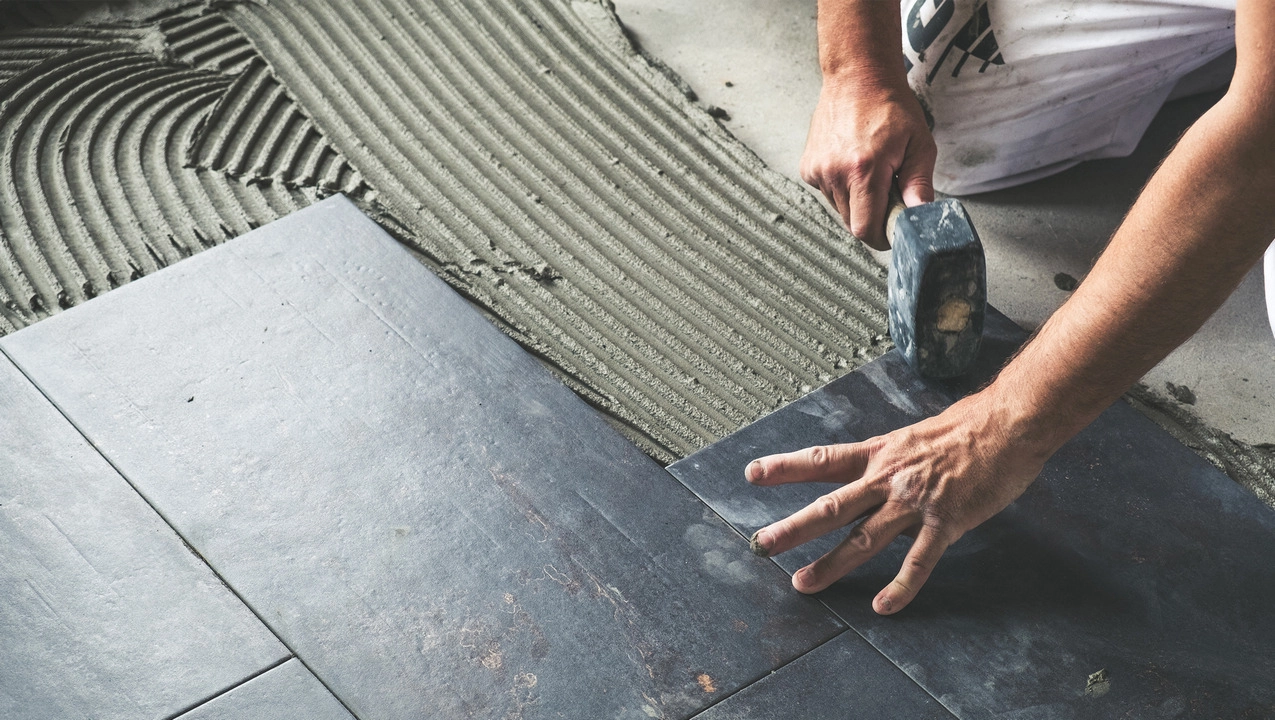
6. Use a Tight and Precise Installation Technique
Carefully place each granite tile into position and press it down firmly. If needed for temporary alignment, use the thinnest possible tile spacers (around 1 mm or less), which must be removed before the adhesive fully dries. This technique requires extreme precision to maintain neat lines without relying on spacers.
Immediately after placing a tile, tap its surface evenly with a rubber mallet to release trapped air and ensure a perfect bond with no voids. Constantly check for levelness with your spirit level to ensure the final result meets the standards of a proper groutless installation.
7. Finishing and Cleaning
After all the granite tiles are installed, let them set for a minimum of 24 to 48 hours before walking on them. Keep the area free from dust and disturbances. For the finishing, since there is no grout, the focus is on removing any adhesive residue from the surface. Clean up any excess mortar immediately with a pH-neutral cleaning solution and a soft cloth before it hardens completely.
As a final step to protect the surface and add a sheen, apply an impregnating sealer made for granite. This type of sealer repels stains without changing the stone's natural appearance. This is an essential step in ensuring your groutless granite installation looks flawless, remains durable, and is truly aesthetic.
A correct granite installation will result in a floor that is strong, beautiful, and comfortable for years to come. By following this groutless installation method, you can achieve a clean, modern look that makes any room feel more spacious. To complement this high-end finish, consider using a quality product like the Matt Piazza Black granite from Meliuz. This collection not only offers a sophisticated aesthetic but is also durable and easy to maintain, making it the perfect choice to beautify your home with class and style.
Product Popular