
Granite is one of the most popular building materials for floors, walls, and other interior elements. Its strength, durability, and beauty make it the top choice for many people when building or renovating their homes. However, to achieve the best possible results, it's essential to understand the proper installation method. In this article, we will go over the step-by-step process for installing granite floors correctly, along with some tips and tricks to help you achieve perfect results.
A Practical Guide to Installing Granite
Here are the steps for installing granite that you can follow:
1. Choose the Right Type and Size of Granite
The first step in properly installing granite is selecting the type and size that suits your space's needs. Granite comes in various sizes, colors, and textures, so it's important to choose one that complements the design of your room. For example, you might opt for neutral-colored granite like white, gray, or beige in a living room. Consider using smaller tiles for smaller spaces to make the room appear larger.
Additionally, ensure you purchase high-quality granite. Look for pieces free of cracks or defects, as damaged granite can affect the installation and its long-term durability.
2. Prepare the Necessary Tools and Materials
Before starting the granite installation, ensure you have all the required tools and materials. Some essential tools to have on hand include:
- A clean, level substrate (floor base)
- Granite polish or special granite adhesive
- A grinder or granite cutter
- A level to ensure proper alignment and height
- Glass cutter for trimming granite if necessary
- A spatula and rubber mallet for leveling the granite
- A sponge or damp cloth to clean up excess adhesive
It's crucial to ensure that the substrate or surface where the granite will be installed is free from dust, dirt, and other debris. This will affect the adhesive's bonding strength and the final installation result.
3. Prepare the Floor Surface
Before beginning the granite installation on the floor, ensure the surface is smooth and clean. If you're installing granite over an existing floor, clean the granite with water and soap. Use a stiff brush to remove any stuck dirt.
For new floors, ensure that the concrete surface is dry and level. If imperfections exist, fix them with a suitable mixture to fill in gaps or holes.
4. Apply the Granite Adhesive
To install the granite correctly, use an adhesive that is specifically designed for granite. This will provide a stronger bond. Use a spatula to spread the adhesive evenly across the floor. Start with a small section to avoid the adhesive drying out before you place the granite tiles.
Be careful not to apply too much adhesive, which can cause the granite to slide or not sit evenly. Aim for an adhesive thickness of about 2-3 mm to ensure the granite's stability.
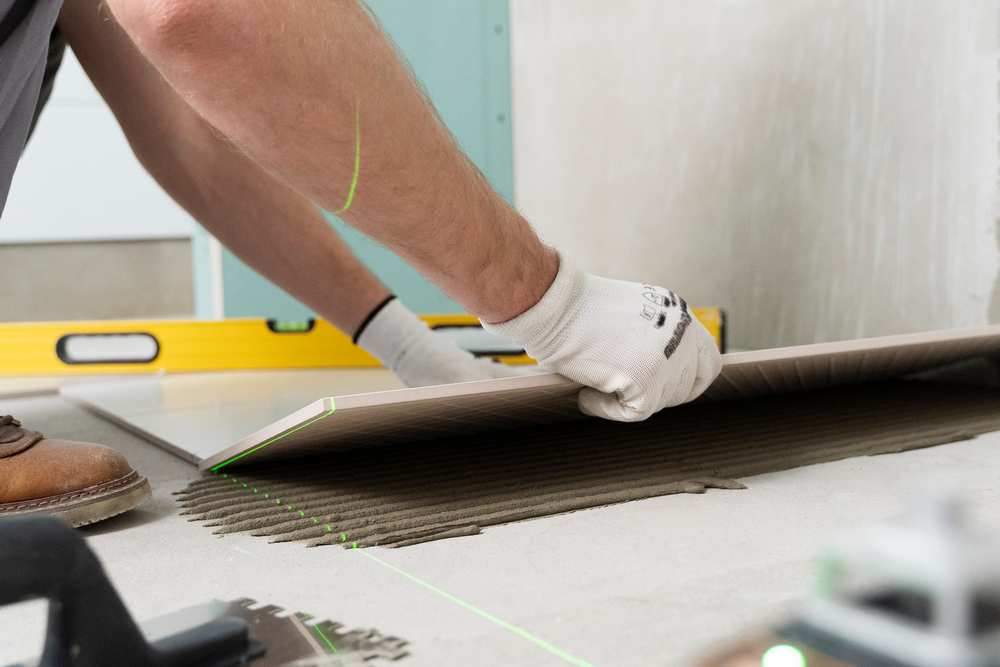
5. Install the Granite Tiles
Start installing the granite tiles one by one with care. Place each tile on the adhesive-coated surface and gently tap it into place using a rubber mallet. Make sure the granite is firmly set and level. Use a level to check that the tiles are aligned properly.
Don’t rush this step; mistakes here can lead to uneven placement or gaps between tiles. Once the granite is installed, ensure each piece is spaced evenly to create a symmetrical and aesthetic pattern.
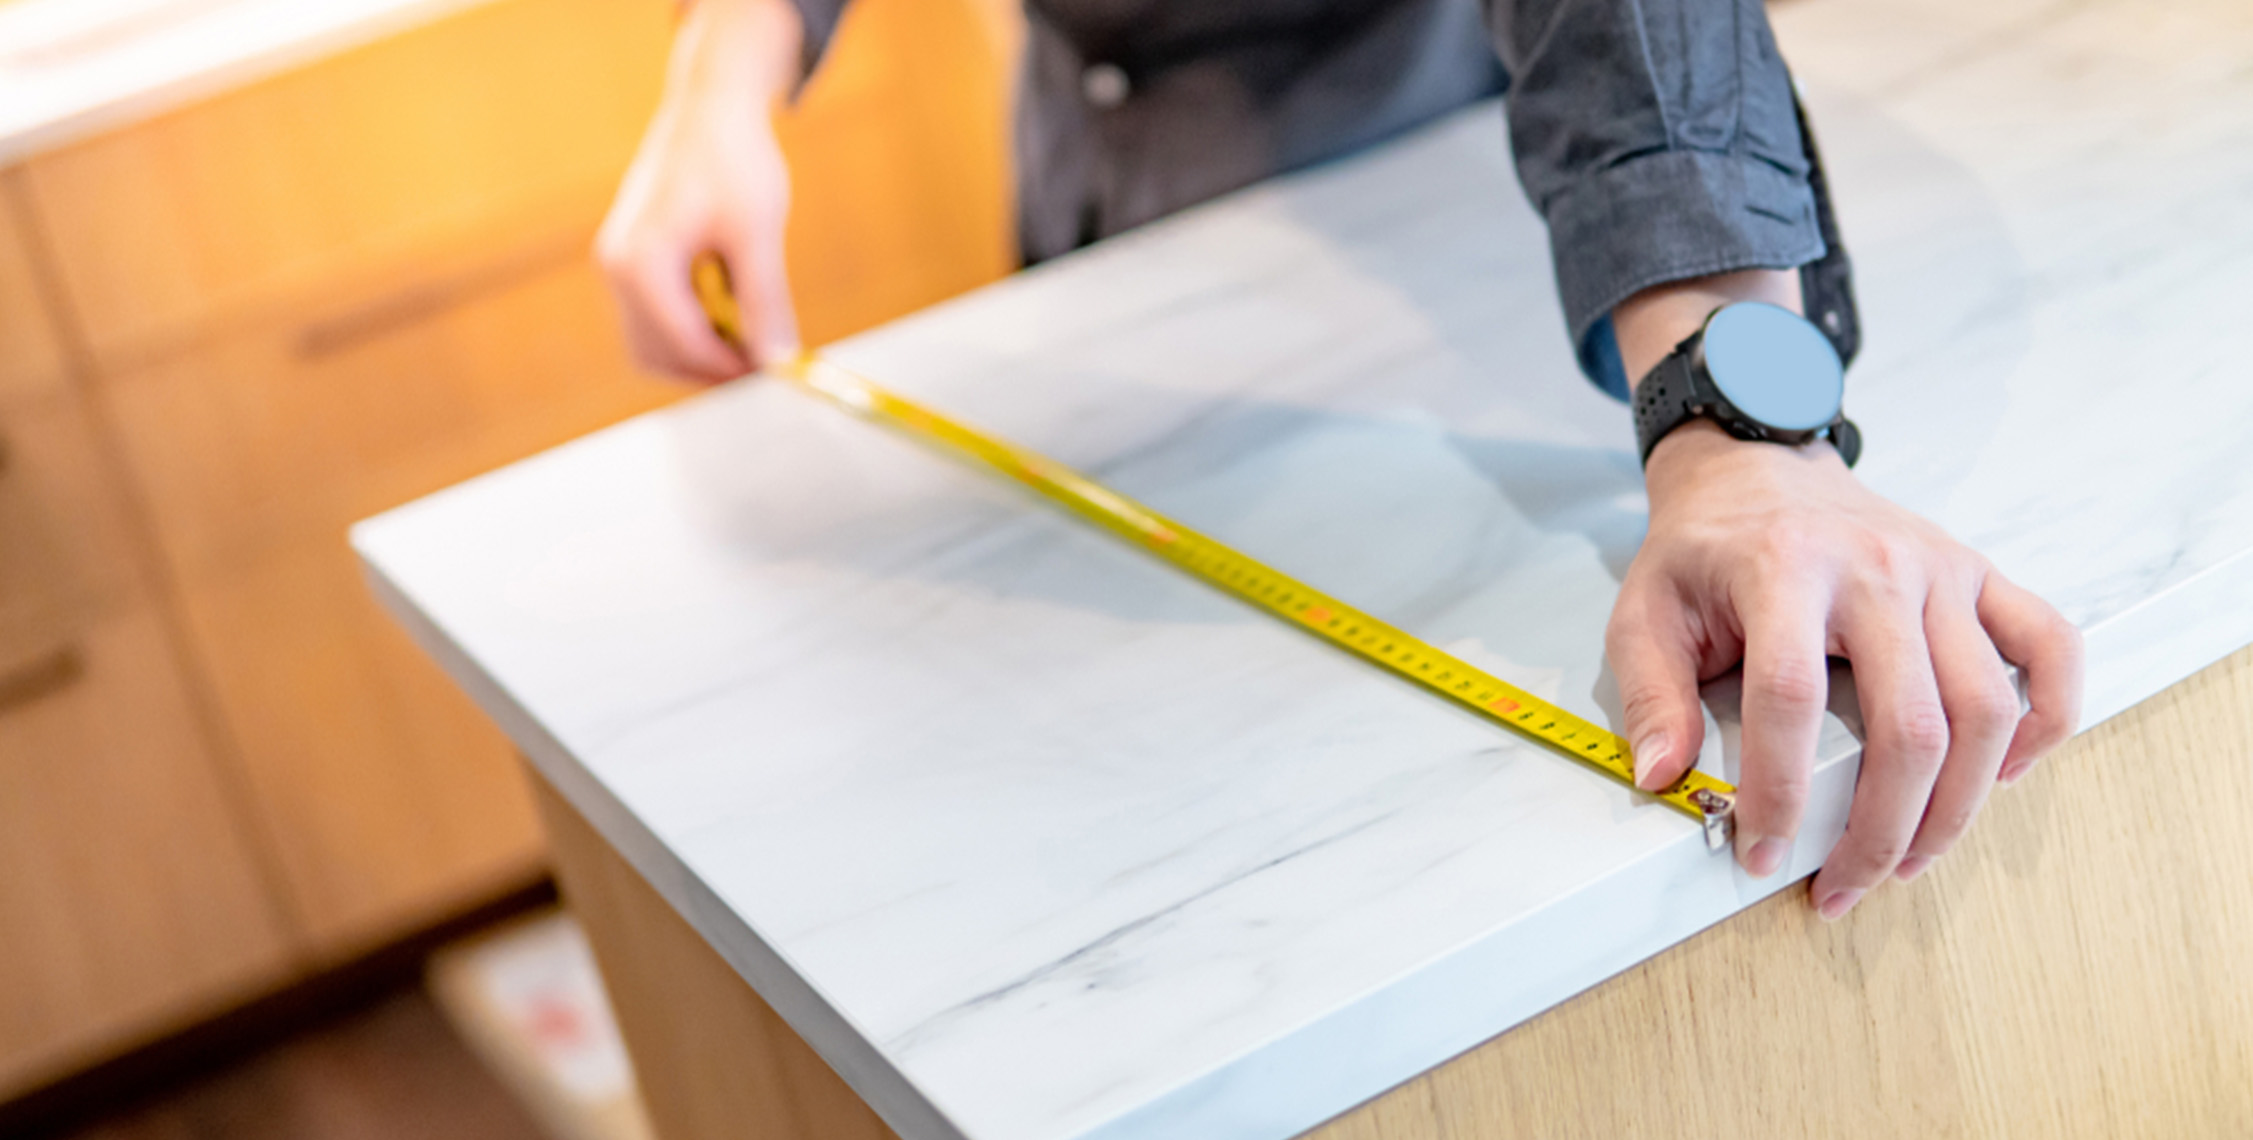
6. Cut Granite as Needed
Often, you’ll need to cut the granite to fit the size of the room or wall. To do this correctly, use a granite cutter or grinder. Cut the granite carefully to ensure a clean, precise cut without damaging the edges.
Before cutting, measure and mark the cutting line with a pencil or marker. Make slow, controlled cuts to achieve accuracy. Don’t forget to wear eye protection and a mask while cutting, as granite dust can be harmful if inhaled.
7. Finish the Installation and Clean Up Excess Adhesive
Once all the granite tiles are in place, clean off any remaining adhesive on the surface. Use a damp cloth or sponge to remove any excess adhesive that hasn't dried yet.
Allow enough time for the adhesive to dry fully. Typically, it takes about 24 hours to cure and reach full strength. Avoid walking on the newly installed floor until the adhesive is completely dry.
Granite Maintenance After Installation
Once the granite is properly installed, it’s important to maintain it to ensure it stays durable and looks as good as new. Here are some tips for caring for your granite floors:
- Regular Cleaning: Clean your granite floors regularly using a damp cloth and mild soap. Avoid cleaners with harsh chemicals, as they can damage the granite’s surface.
- Use Protectors: Place protectors or mats to prevent scratches or damage from sharp objects.
- Avoid Excess Moisture: Do not allow water to pool on the granite surface for extended periods, as it can damage the surface layer and cause stains.
By following these maintenance steps, your granite will remain beautiful and long-lasting.
Installing granite correctly requires attention to detail and careful planning. Following the steps outlined above, you can ensure that your granite installation is neat, strong, and durable. Don't forget to choose high-quality granite, like those available at Meliuz, which offers both beauty and durability for your floors. With the right choice of granite and proper installation, your home will look even more elegant and stand the test of time!
Product Popular